PaperSt.AI
Set up the starter kit.
From a blank Windows PC to your first working session with Claude Code. Every command is here, in order. Written for someone who has never opened a terminal — copy each dark box exactly and you're set.
Part 1
Install your terminal (WSL + Windows Terminal)
WSL is a real Linux terminal that runs inside Windows. Skip this first bit if you already open something called Ubuntu from your Start menu. Otherwise:
- Click Start, type PowerShell, right-click it, choose Run as administrator.
- Paste this and press Enter:
wsl --install - Restart your computer when it finishes.
- After the reboot an Ubuntu window opens and asks you to make a username and password. Pick any username and a password you'll remember (the password stays invisible as you type — that's normal). This is your Linux login.
▲ If wsl --install errors
Run Windows Update first, then try again. On some PCs you also need to turn on “Virtual Machine Platform” in Turn Windows features on or off. Restart and retry.
Recommended: get Windows Terminal (a nicer window with tabs)
Windows Terminal is a cleaner terminal than the default, and it's free from the Microsoft Store. Three steps, one under each picture:
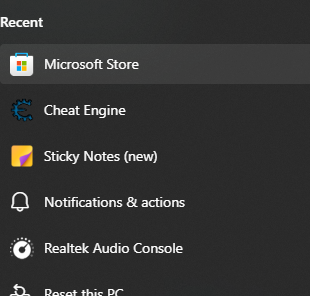
1. Open the Microsoft Store from your Start menu.
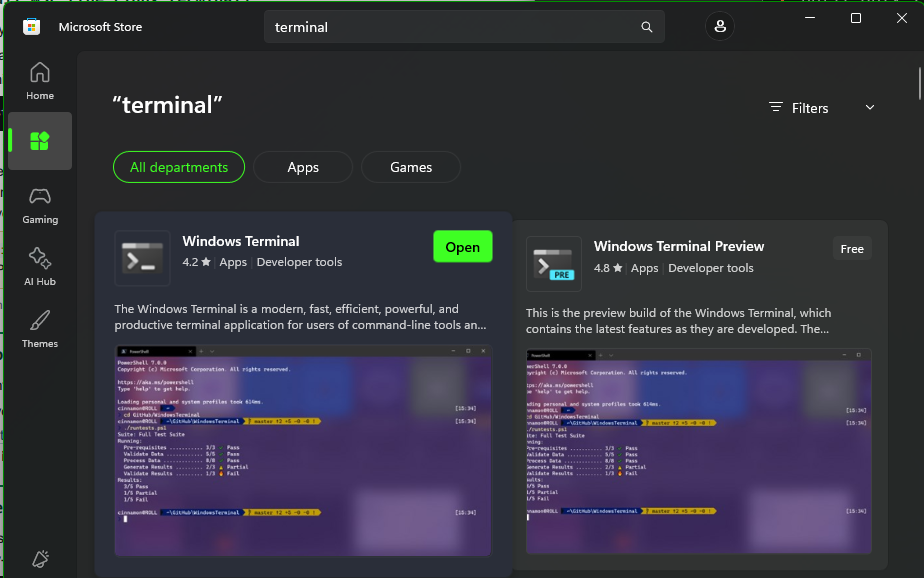
2. Search Windows Terminal and click Get (it says Open once it's installed).
3. Open it, click the ▾ arrow next to the tab, and choose Ubuntu to get a Linux tab.
From here on, everything you paste goes into the Ubuntu tab.
Part 2
Accept the GitHub invite
Joseph sent you an invite to the code. Accept it first, or the download in Part 4 won't work:
- Check your email for a message from GitHub and click Accept, or
- Go to github.com/Cypherthread/paperst-os-demo/invitations (sign in as your GitHub account) and click Accept invitation.
Part 3
Connect GitHub to your terminal
This installs GitHub's tool (gh) and logs you in. Paste the whole block below as one piece — it's long, but it's a single copy-paste:
(type -p wget >/dev/null || (sudo apt update && sudo apt install wget -y)) \
  && sudo mkdir -p -m 755 /etc/apt/keyrings \
  && out=$(mktemp) && wget -nv -O$out https://cli.github.com/packages/githubcli-archive-keyring.gpg \
  && cat $out | sudo tee /etc/apt/keyrings/githubcli-archive-keyring.gpg > /dev/null \
  && sudo chmod go+r /etc/apt/keyrings/githubcli-archive-keyring.gpg \
  && sudo mkdir -p -m 755 /etc/apt/sources.list.d \
  && echo "deb [arch=$(dpkg --print-architecture) signed-by=/etc/apt/keyrings/githubcli-archive-keyring.gpg] https://cli.github.com/packages stable main" | sudo tee /etc/apt/sources.list.d/github-cli.list > /dev/null \
  && sudo apt update \
  && sudo apt install gh -y
It may ask for your Ubuntu password (the one from Part 1). Type it (invisible) and press Enter. Now log in:
gh auth login
It asks a few questions. Answer with the arrow keys + Enter:
- Where? → GitHub.com
- Protocol? → HTTPS
- Authenticate Git with your GitHub credentials? → Yes
- How to log in? → Login with a web browser
- It shows an 8-character code. Copy it, press Enter, and a browser opens. Sign in to GitHub, paste the code, and click Authorize.
▸ Check it worked
Run gh auth status — it should say “Logged in to github.com” with your username.
Part 4
Download the repo
gh repo clone Cypherthread/paperst-os-demo && cd paperst-os-demo
That downloads the files into a folder called paperst-os-demo and steps you inside it. Stay in this folder for the rest.
Part 5
Install Claude Code
Claude Code is the assistant that actually operates the repo. Install it:
curl -fsSL https://claude.ai/install.sh | bash
Then start it (still inside the paperst-os-demo folder):
claude
The first time, it walks you through logging in to your Anthropic account in the browser. Follow the prompts.
▲ If claude says “command not found”
Fully close the Ubuntu window, reopen it, run cd paperst-os-demo, and try claude again. New tools only “wake up” in a fresh terminal.
Part 6
Paste the setup prompt — Claude does the rest
Once Claude is open and you see its prompt, paste this in exactly and press Enter. It tells Claude to read the whole system, figure out where it is, and install everything else for you:
Read and understand this session, then thoroughly scan this whole
repository and locate yourself before doing anything.

1. ORIENT. Run /session-start, and read these end to end: START-HERE.md,
   SETUP.md, STACK.md, SAFE-TO-TOUCH.md, GLOSSARY.md, CLAUDE.md, and
   memory/INSTALL.md. Then tell me in plain sentences: what this repo is,
   what branch I'm on, and what it's for. Don't skip this.

2. SCAN. Map the whole repo (every top-level folder + what it's for),
   including the tools/ gates and the .claude/ commands and agents.

3. SET UP MY MACHINE, following SETUP.md + STACK.md exactly. Check for
   Node 18+, python3, and curl; if Node is missing, install it with NVM
   (node 22). Then run bash tools/setup.sh and confirm every gate runs.
   Explain each step in plain English, and pause before anything that
   needs my decision or a password.

4. INSTALL THE RULEBOOK so it auto-loads (memory/INSTALL.md, Option A):
   copy this repo's memory/ folder into my Claude auto-memory path for
   this project. Prove it worked by naming one rule from MEMORY.md.

5. PLUGINS + SKILLS (STACK.md section 3): tell me which plugins and
   marketplaces this system uses, set up the ones that don't need my
   accounts, and list the ones that do.

6. WHAT I STILL NEED (STACK.md sections 1 + 4): give me a short checklist
   of what only I can do — log in to Claude Code, set effort to xhigh,
   and connect any MCP / claude.ai connectors a real job needs.

7. REPORT: what you installed and verified, what still needs me, and the
   next 2-3 things to do. I'm new to this — keep it simple, never do
   anything destructive, and respect SAFE-TO-TOUCH.md. When unsure, ask
   me before acting.
Advanced: running a session unattended
Normally Claude asks your permission before it runs a command or changes a file. For a long job you trust, you can start it so it doesn't stop to ask, by opening it this way instead of just claude:
claude --dangerously-skip-permissions
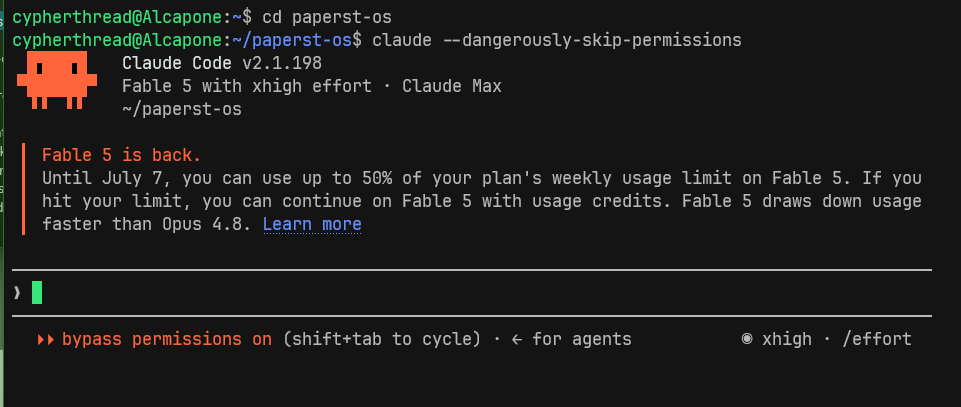
A real unattended session: started with claude --dangerously-skip-permissions, it runs straight through without pausing for yes/no prompts (note “bypass permissions on” at the bottom).
✕ Heads up — this skips your safety net
The flag turns off the permission prompts, so Claude won't ask before running a command or editing a file. Use it for tasks you trust or unattended overnight runs — not your first hands-on sessions, where those prompts are how you stay safe. Start with a plain claude until you're comfortable.
Part 7
Two dials: your model and your effort
Inside a Claude session you have two knobs that decide how it works. You'll mostly leave them alone, but it helps to know what they do. Both trade speed + usage against capability + thoroughness — the skill is matching them to the task in front of you.
Model — which Claude brain runs the session (type /model)

Type /model, pick a number, then Enter to make it your default (or s for just this session).
- Opus 4.8 (the Default, 1M context) — the everyday workhorse. Best for most real, complex work.
- Fable 5 — the most capable, for your hardest and longest-running jobs. Stronger, but it uses up your plan faster.
- Sonnet 5 — efficient for routine tasks; faster and lighter.
- Haiku 4.5 — the fastest, for quick answers.
/fast turns on Fast mode (Opus 4.8 with quicker output) when you want speed without dropping to a smaller model.
Effort — how hard it thinks before acting (type /effort)
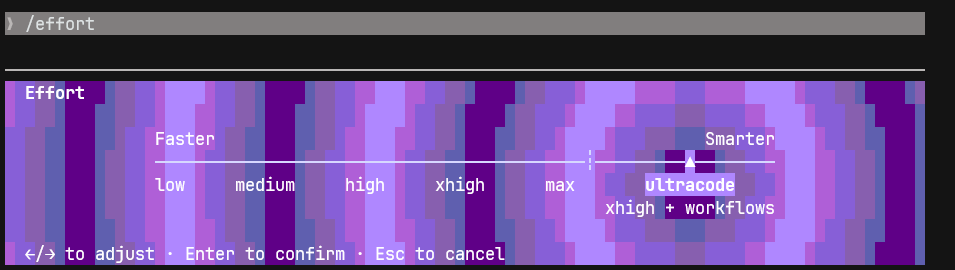
Type /effort, use ←/→ to slide from low toward max (or ultracode), then Enter.
Effort is the thinking budget: low → medium → high → xhigh → max → ultracode. Higher means more careful reasoning (slower, more usage); lower means quicker and cheaper. ultracode is xhigh plus workflows — it can spin up several agents at once for the biggest jobs.
◆ This kit runs at xhigh on purpose
The work here touches real client systems and live deploys, so it favours careful reasoning over speed. Leave it at xhigh for real jobs; only drop lower for something trivial.
How to use them together
| The task | Model | Effort |
|---|---|---|
| Everyday real work (the default here) | Opus 4.8 | xhigh |
| Quick question or a tiny edit | Sonnet 5 / Haiku 4.5 | low–medium |
| Hardest / longest / highest-stakes job | Fable 5 | max or ultracode |
▲ Watch your usage
A bigger model at higher effort burns your plan limit faster, so don't run a quick lookup on Fable 5 / max — and don't run a live client deploy on Haiku / low.
Part 8
What happens next
Claude will talk you through it. It installs the tools, sets up the gates, loads the rulebook, and tells you the few things only you can finish (your Anthropic login, and any accounts a specific job needs). Just read what it says and answer when it asks.
Part 9
Where to start reading
You can explore the whole thing with nothing installed — it's all plain text. Best order:
- START-HERE.md — the map and the reading order.
- GLOSSARY.md — the ~50 terms the system runs on.
- SAFE-TO-TOUCH.md — what's safe to change (read this before you edit anything).
- JOBS.md — “what do you want to do?” routes each job to the right command.
- FIRST-TASK.md — a safe first practice run.
Part 10
If you get stuck
- Take a screenshot of the terminal and send it to Joseph — the exact error is what matters.
- Most first-time snags are fixed by closing and reopening the Ubuntu window, then re-running the command.
- Inside a Claude session you can just ask Claude: “this command gave me an error, what do I do?”
✓ You're set up when…
- The Ubuntu tab opens in Windows Terminal (or from your Start menu).
gh auth statussays you're logged in.- You're inside the
paperst-os-demofolder. claudeopens and you're logged in to Anthropic.- You pasted the setup prompt and Claude finished its report.